Wednesday, June 26, 2013

BBB: Blackberry Basil Buckle

Adapted from Alexandria's Kitchen for the buckle idea, and my cousin Katrina (via Ally's Kitchen) for the blackberry and basil combo! Plus a little bit of my own experimentation. :)

As I said, I got the idea for the combination of blackberries and basil from my cousin Katrina. She is looking for wedding cake alternatives, and liked the idea of the two together, so she asked me if I would be willing to experiment with it to make a bar-type dessert.  What a great excuse for me to be in the kitchen, right?! :D
So I set out on my adventure to experiment with baking recipes...something I have always thought never to do because it is so precise, and easy to mess up!  But I decided to just jump right in.  I found a rhubarb buckle recipe that had a nice bottom crust and crumble topping, so I just thought I would replace the rhubarb part with blackberries and basil.  Simple enough right?

I started out by making the crust first, because it needs to chill for at least an hour before using it.  Whisk together the flour and sugar in a bowl, then cut in the chilled and chunked butter, blending with a pastry blender until it has a coarse texture and pea size chunks of butter left (a little bit finer than the picture, some of those chunks are a little big yet).  In a separate bowl, combine the heavy cream and egg and beat well, then stir it into the dry ingredients and gently knead (with floured hands if its sticking) until a dough forms.  Flatten the dough ball into a disk and chill for at least an hour.  If you don't have heavy cream, you can substitute 1.5 tbsp milk and 1/2 tbsp. butter, tempered together.  This will work with any recipe that calls for heavy cream in baking, as long as it doesn't need to be whipped.


In the meantime, collect your basil, blackberries, and lemon, washing and drying them all well.  The basil I used came straight from the garden so it had extra dirt on it, so I placed it in a bowl of water and swirled it around to let all the dirt sink to the bottom while the leaves float.  Then I set them out on a paper towel, patting them with another towel to dry them. Alternately, if the basil is store bought, you could rinse and dry it in a salad spinner.  This method just works well if there is a lot of excess dirt on the leaves.  Also prepare the lemon zest for the fruit mixture.  I don't have a micro-plane to grate the lemon, so I used a regular cheese grater and it worked just fine.


Chop the basil into medium size pieces, and combine in a bowl with the blackberries, lemon zest, and sugar. Stir well and mash the blueberries slightly.  Let it sit for a while (in this case until time to use it in the bars), allowing the mixture to macerate.  You can stir it every once in a while to aid in that process.


To make the crumb topping, simply mix together the flour, brown sugar, and salt.  Then add the softened butter and mesh with your hands until it is clumpy. Mine didn't end up very clumpy so I am contemplating the implications.  It was still yummy, but I wonder if using all white flour instead of half and  half would help with this....perhaps next time I make it, the crust will be 100% whole wheat and the crumb topping will be 100% all purpose flour...


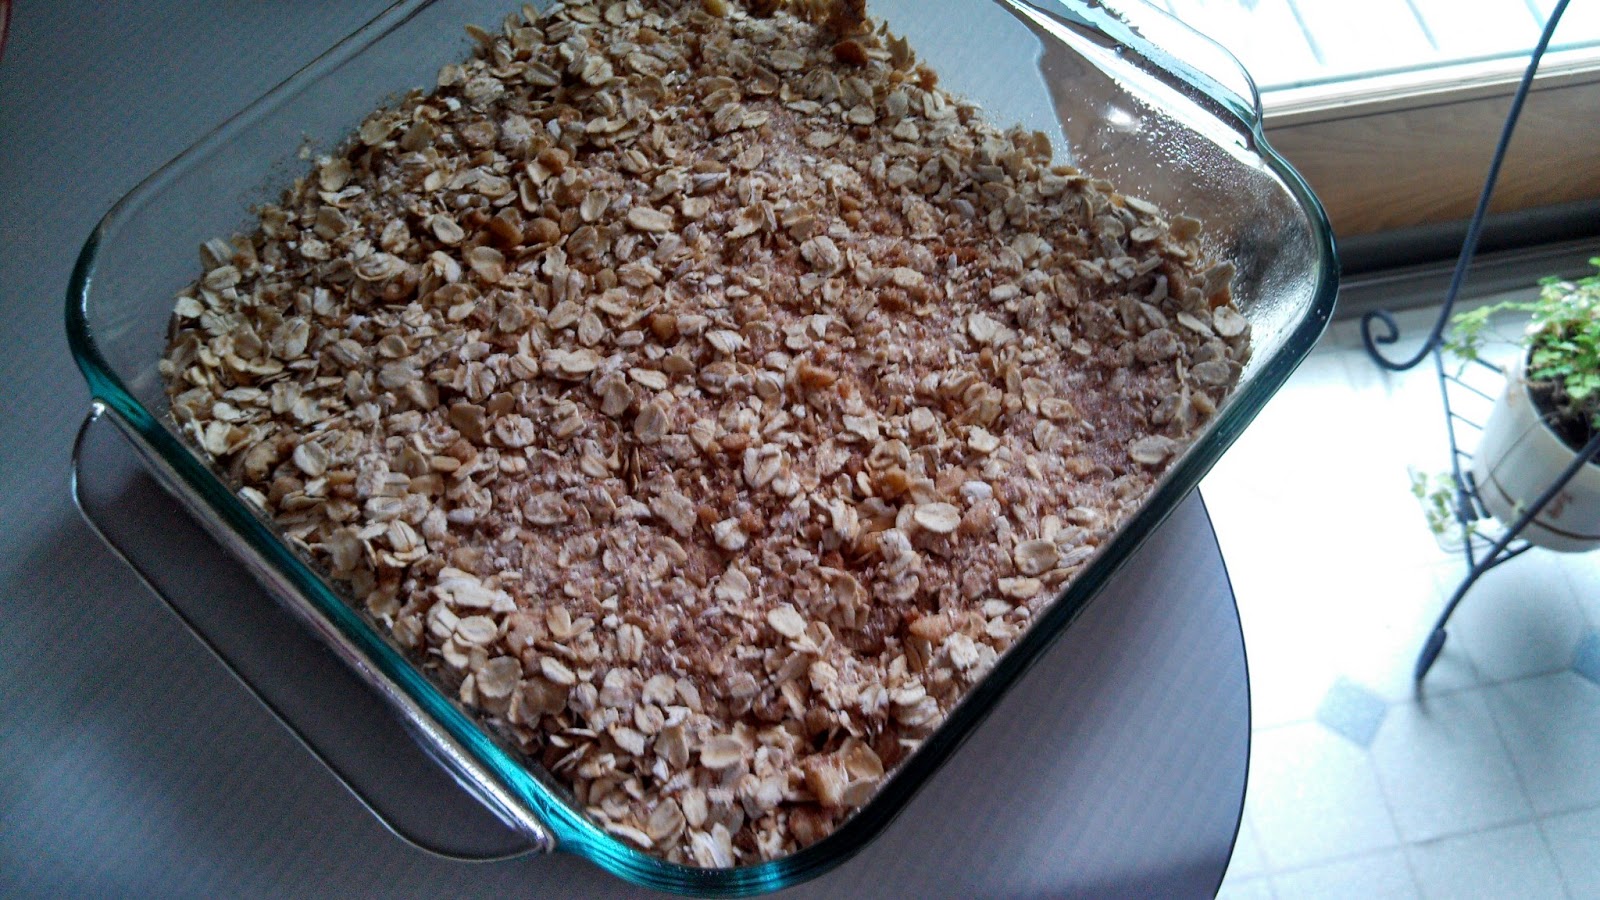
Preheat the oven to 400 degrees Fahrenheit. Line a 9x9 baking dish with parchment paper, pressing down into the corners and edges.  Take the the dough out of the fridge after an hour minimum, and place it in the center of the dish and flatten it, pressing all around the sides and edges to make sure the dough is evenly spread into the corners and center (I contemplated if it would be better to chill the dough for a half hour, then do this step, then chill it again once its pressed into the pan....that will be another modification I will make next time I try it!).  Then spread the fruit mixture on the crust, topping with the crumble.  Bake in the oven for 30 minutes at 400 degrees, then reduce the heat to 350 and bake for an additional 25 minutes.


The buckle will be golden brown on top with the fruit mixture bubbling through slightly.  Let sit for about 15 minutes before doing anything with it. It will be too soft to pull the parchment paper out yet.  After the resting period, pull buckle out of the dish and cut into squares. :) Each bar should come out fairly clean, with a solid crust.


Yummy!  I would have never thought of mixing basil and blackberries, but this one is definitely going in the recipe box to make in the future! I had to sneak 2 pieces right away because it was so good. :) For the full recipe and nutritional information, click HERE.

Another chill song...this time from the band Cocoon, called "Owls."


Thanks for stopping by!

Monday, June 24, 2013

A Multicultural Feast: Take Two!

This week was packed full of even more cultural presentations, and thus even more food! We started out the week by covering the different regional areas of the United States, including Alaska (Salmon Dip), Northeast/Mid-Atlantic (Cheddar Apple Pie), South East (Mississippi Okra and Tomatoes), South Atlantic (Ambrosia), South West (Shrimp Po' Boy Sandwich), and the West (Island Mango Tilapia).  Then we moved on to more ethnic groups, including African American (Baked Macaroni and Cheese), Greek (Moussaka), French (Macarons), Hmong (Tapioca with Coconut Milk), Mexican (Chicken Chimichangas), Scandinavian (Lingonberry Muffins), Caribbean (Fried Plantains), German (Apple Dumplings), Chinese (Stir Fry Tomato and Eggs), Native American (Fry Bread), Filipino (Pineapple and Coconut Curry), and Japanese (Yakisoba)!

Ambrosia
Macarons
Yakisoba
Multicultural Foods class is foodie heaven! And even my teacher could tell how much I was enjoying myself.  After my presentation on Greece, the first thing she said was something along the lines of, "I think we can all tell you really love food!" Haha. What can I say...am I that transparent?! I guess I might have been just a little overenthusiastic. But how can I help myself? I have had so much fun these past two weeks and have met some wonderful people, like my new friend Abby (turns out she has a food blog too! check her out at http://thetickledpinkturnip.blogspot.com/)!

Shrimp Po’ Boy
Shrimp Po Boy Sandwich
Apple Tart with Cheddar Cheese Crust
Apple Tart with Cheddar Cheese
Okra and Tomatoes


So, again, I wanted to share some of the recipes and experiences with you all from this week.  I'd like to say I'm pretty adventurous when it comes to trying foods, and I will rarely ever not try something at least once.  However there were a lot of things we made this week that I had never had before.  The Alaskan Salmon Dip being the first.  It consisted of smoked salmon, lemon juice, onion, horseradish (which I am normally not a fan of!), garlic, capers (also have never tried these...and I will admit I have been slightly scared of them. Something in the name made me think they were going to be hard and spicy, kind of like those little seeds that are in pizza sausage!), mayonnaise, cream cheese, salt and pepper, and pecans and parsley for garnishing.  Everything basically just gets mixed together and eaten with crackers or chips.  So the horseradish and capers were the reason I was leery about this one at first. but the horseradish was not even noticeable, and the capers were a nice surprise!  In fact they weren't crunchy at all. Haha. I have no clue where I got that idea from.

Smoked Salmon Spread Recipe
Alaskan Salmon Dip
I would definitely make it again, some changes I would make to make it more healthful are: Substitute olive oil mayo for regular mayo and add less of it, Substitute Neufchatel cheese  for regular cream cheese. With those substitutions, it is a dip that is actually not half bad for you. Granted you probably shouldn't eat it every day, but the salmon is high in health omega 3 fatty acids, and the chopped nuts (whether you use pecans, walnuts or almonds, are also full of healthy fats.

I can see this is already turning into something longer than I would like, so I will just talk about the Greek Moussaka and then get to the recipes for the rest, because that's the important part right?!  So, Moussaka (pronounced moo-sah-KAH) is a very popular dish in Greece, the origins of which are fuzzy....I think it came from the Arabs to the Turks, and then from the Turks to the Greeks.  But nevertheless, it made its way to Greece and became very common.  It is a layered dish that is precooked ahead of time, and then baked in the oven to further develop the flavors (similar to lasagna in that way!).  The recipe we used was from Simply Recipes and can be found HERE.

Moussaka
Ours didn't look as pretty as the picture, But it sure tasted good! :)  So, for the layers...they consist of potatoes, eggplant, spiced lamb meat sauce, more eggplant, cheese, bechamel (pronounced bay-sha-mel), and more cheese!  The meat sauce has a plethora of different flavors going on, which really give this dish something unique I think. There is cinnamon, allspice, oregano, garlic, black pepper, salt, onion, red wine, lemon, and tomato paste!  All of the layers took a while to prepare and put together, however it was definitely worth it, because it was really good and it was something new and unique that nobody had ever tried before. I know that I'll be putting it in my recipe book.

The recipes for the Salmon Dip and the rest of the above dishes can be found through the links below:

U.S. Regional Recipes
Salmon Dip - Alaska
Ambrosia - Florida
Cheddar Apple Pie - Vermont
Okra and Tomatoes - Mississippi
Shrimp Po' Boy Sandwich - Louisiana
Island Mango Tilapia - Hawaii

Ethnic Group Recipes
Baked Macaroni and Cheese - African American
Moussaka (includes nutrition information)- Greek
Macarons - French
Tapioca with Coconut Milk - Hmong
Chicken Chimichangas - Mexican
Lingonberry Muffins - Scandinavian
Fried Plantains - Caribbean
Apple Dumplings - German
Stir Fry Tomato and Eggs - Chinese
Fry Bread - Native American
Pineapple Coconut Curry - Filipino
Yakisoba - Japanese

Try a few!

I actually was obsessing over this song a couple months back when I heard it at a wedding, but I just found it in my iTunes library again today and thought I would share it.  Plus it fits with the theme this week because Enrique is Spanish. :P  Enjoy "Finally Found You" by Enrique Iglesias.


Thanks for stopping by!

Monday, June 17, 2013

A Multicultural Feast

Who here loves ethnic food and trying new things? I know I do! I have been absolutely loving being in my Multicultural Foods class for the past week.  I almost wish it were longer than just two weeks! In the first week, we covered Greek, Pakistani, Korean, and Norwegian foods. Every day we get to cook and sample cuisine from other cultures.  I have already learned so much in this class, and the food has been amazing!

The Greek foods we made were Greek Salad, Spanakopita, Hummus, Greek Chicken, Tzatziki, Pita bread, and Baklava.  I am especially fond of Mediterranean food, so I really enjoyed this day.  I had never had Spanakopita or baklava before, and I had no experience with making pita bread.  Spanakopita is a spinach and cheese pie made with either fresh or frozen spinach, feta cheese, and phyllo dough (if you've never had it, you're missing out!).  You layer the phyllo dough at the bottom of a pan and brush it with butter, and then lay in a wilted spinach and cheese mixture, then cover it with more phyllo dough and brush with butter, and bake it.

Spanakopita
Baklava is similar to Spanakopita in that it involves layering phyllo dough and putting a filling in between the layers.  There are many more layers to Baklava, though, and the filling is a mixture of nuts and spices. The Greek version traditionally uses just walnuts, but you could make it with any combination of nuts.  Once the layers are put together for the Baklava, it is cut into small triangles and then baked, and when it is done, you pour a sugar and honey mixture over it.  You really only need one small square because this dessert is so rich!  The last thing I will say about the Greek food was that making the pita bread was a lot of fun.  You make somewhat of a regular yeast bread dough, but you form it into smaller balls and then roll it out with a rolling pin, and bake it flat.  If you do it right, it puffs up like a balloon and then deflates when it cools, but it leaves a large pocket on the inside to stuff other ingredients into it! I won't go into too much detail about the other dishes we made, but I have page with all the recipes listed HERE.

Baklava
The Pakistani foods we made were Rasmalai, Butter Chicken, Chapati, and Mixed Vegetable Pulao.  All of these dishes incorporated many spices, as they are used in their all of their cooking.  A dish without seasonings is seen as a dish without flavor! Rasmalai is a dessert that is normally served cold. Traditionally, you use Indian Cheese (although we used ricotta), mixed with sugar, and form it into balls.  Then you create a mixture of heavy cream, half and half, sugar, and cardamom in a saucepan and bring it to a boil.  The cheese balls are dropped in the boiling mixture to cook and then chilled until serving time.

Ras Malai
Butter Chicken is seasoned with a type of curry that includes Garam Masala, Fenugreek, Tandoori, and many other spices.  It was a flavor that I cannot even describe or compare to anything else I've ever tasted, but it was so good!  Chapati a type of whole wheat flat griddle bread that is eaten every day, and is used to pick up food.  It is made in a similar manner to the pita bread, however it does not use any yeast, and it is fried in a dry pan rather than in the oven.  The Veggie Pulao was also delicious, and it was just a mixture of vegetables with basmati rice and spices and seasonings. All of the recipes we used can be found HERE.

Chicken Makhani (Indian Butter Chicken) Recipe
Butter Chicken/

We also made several Korean dishes, including Bi-Bim-Bop (Beef and Mixed Vegetable Rice), Bul-Go-Gi (Marinated Beef), Jap-Chae (Vermicelli Noodles), Dae-Ji Bul-Go-Gi (Marinated Spicy Pork), and Yu-Bu-Cho-Bap (Seasoned Fried Bean Curd Slice).  My favorites were the spicy marinated pork and the marinated beef.  The first four recipes can be found at http://www.trifood.com/ by navigating through the side links, and the Fried Tofu can be found at http://www.maangchi.com/recipe/yubuchobap.

Lastly, the only Norwegian food we made was Lefse, and it was something I had never heard of (It seems as if I am in the dark on cultural foods! I definitely need to change that.).  It is basically a type of potato pancake.  You boil your potatoes and then rice them, adding butter, sugar, salt, heavy cream, and flour to form a dough.  You then roll the dough out as thin as possible, while still allowing yourself to be able to handle the rolled dough.  It is then placed on a dry skillet and fried for a minute or two on each side.  It is traditionally served with butter and brown sugar, but other toppings, whether sweet or savory, could be used.  A recipe for Lefse can be found HERE.
Lefse
Nick just showed me a Russian band called Leningrad, and I liked one of their songs (despite the fact that I don't know what they're singing about! :P).  But this song reminded me of Pinocchio for some reason. Haha. Don't ask.  But here it is! "Fish" by Leningrad.


Thanks for stopping by!

Tuesday, June 11, 2013

Blueberries & Blackberries & Raspberries, Oh My! Oh, and Strawberries Too!

That's right, its smoothie time! It's pretty much necessary, considering I just brought home 2 containers of raspberries, 2 containers of blackberries, a container of blueberries, and a container of strawberries. You guessed it, I went to the grocery store again! :) But only to buy fresh fruit for the week to eat with my Tator Tot Casserole!  Well I ended up getting some lettuce, tomatoes, and milk too, but that's minor compared to what could have happened.  And get this, I spent a total of $16! That's IT! Normally this lot of food would cost at least $25-30 (especially with all those berries!) at any other grocery store......have I convinced you to shop at Aldi yet? :P


Start off by rinsing your berries.  A good trick is to put them in a colander and rinse them with the faucet, then fill a large bowl with water and a tablespoon or two of vinegar, and then nest the colander full of berries in the bowl.  The vinegar makes the berries stay fresher for longer, so if you don't use them all right away, they won't grow mold as quickly.


Drain the berries, and measure out a half cup of each of the four kinds.


Place them in a blender or smoothie maker (I use the Ninja kitchen system with special sized smoothie cups) with the honey and ground flax, and blend until smooth.


Garnish with extra berries!


Even if you only buy one container of each fruit, you will still have lots of leftovers so you can make these delish smoothies a few mornings in a row. :)

For full recipe and nutrition facts, click HERE.

I hope if you've never heard of this band, you check them out after listening to this song.  Here is "Someday" by No More Kings.


Thanks for stopping by!

Monday, June 10, 2013

Comforts of Home - Tator Tot Casserole

Being from the midwest, one can't help but love a good casserole.  This one was one that my mom made all the time when my brother and I were kids, and continues to make today.  Let me say that no matter how simple it is, it melts in your mouth every time.  Maybe it has something to do with those memories of the peering into the oven and seeing that big black speckled roasting dish, only to open the oven when it's done and take in the comforting aromas. :)

I have been waiting to make this one on my own for a couple weeks now, and now that I am back at school for two weeks, I thought it would be the perfect time!  I'm going to be in class for half of the day every day, so now I can just come back to my apartment in the evening and heat up a section of casserole for supper.  I didn't make the most healthy version of it, however I did use lean ground beef (which you could rinse and drain further if you are really watching it), and put lots of vegetables in it.  Sometimes you just can't beat those comfort foods.  In the future, I would like to try making my own Cream of Potato soup to use, just to cut back on the sodium and preservatives, but I happened to have a few cans on hand and am trying to get rid of all my food in my cupboards before I leave for the rest of the summer!  I also used canned vegetables because, again, its what I have here at my apartment...not much freezer space when you are sharing with 5 other girls!!  If you use fresh or frozen vegetables, the sodium would be much more controllable because you could add as much or as little salt as you wanted.  Here, I didn't add any salt at all because I used so many canned goods (TIP: Rinse and drain your canned veggies! It helps.)  More tips on how to make this healthier are on the recipe page linked at the bottom of this page.

Preheat the oven to 350 degrees Fahrenheit.  Then start browning your ground beef in a skillet.  While that is cooking, you can prepare the veggies by draining and rinsing them, and then pouring them into a large bowl.  Empty the cream of potato soup into the veggie mix.  Add your seasonings and cooked ground beef (rinsed and drained if you prefer, but with 90/10 ground beef you won't have much grease anyway.  Plus if you can spare it, it adds a little more flavor and further keeps the casserole from being dry.).  Fold the mixture a few times to make sure it is well mixed. Spread the mixture into the bottom of a 9x13 pan, then place the tator tots on the top in rows.


Now all that is left to do is bake it in the oven and let all the flavors meld together!  Let it bake for approximately 50-55 minutes until hot and bubbly, and the tator tots are golden brown.


I didn't because I don't have any, but you could also sprinkle some shredded cheddar on top while it is still hot so it can melt and add another layer off goodness to your casserole. :)  This one never fails to please. I'll be enjoying it all week long.

One last thing I want to note is that I did not cover the casserole when I baked it, however after finding out that the tator tots were a little dry after the full baking period, I would suggest covering it with foil while it is baking.

For the full recipe and nutrition facts, click HERE.

Enjoy the tunes of AWOLNATION today, with "Jump on My Shoulders."


Thanks for stopping by!


Friday, June 7, 2013

Apples and What?!

Apples and Onions, that is!  If you have never had this combination before, trust me, you are going to want to try this one!  Your taste buds are in for a real treat!  Now, it's not exactly apple season, however it IS June dairy month, and what better way to celebrate than by making grilled cheese sandwiches with yummy Wisconsin made cheese? :D

All you will need are these 6 ingredients: olive oil, ground thyme, sweet onion, an apple, extra sharp cheddar cheese, and 100% whole wheat bread.

Since the onion is a stronger flavor than the apple, you will only need half of an onion that's about the same size as your apple, so you have about a 1:2 ratio. Once the onion is cut in half, then turn it crosswise and slices shaped like C's. Then add them to a skillet with olive oil on medium heat.  Also add the thyme and salt at this time and cook for about 10 minutes, stirring occasionally.


While the onions are cooking, cut the apple in half, and again into quarters.  Cut out the seeds, and cut the apple into 1/8 inch thick slices.  After the onions have cooked for 10 minutes, add the apples, and cook for another 10 minutes, stirring occasionally.
While the apples and onions are cooking, slice enough cheese (about 4.5 oz) for three sandwiches.  Can you ever really have too much cheese on a grilled cheese sandwich? Didn't think so. I mean, I come from a world where cheese is entirely it's own food group. Also, if it's not sliced perfect (see mine?), no worries, it's all going to be melted into ooey gooey goodness soon anyway!
Take the apples and onions off the heat after the 10 minutes is up.  It will look something like this.
Now you can start assembling your sanwiches.  Place the bread flat on the table and add the cheese.
Put an equal amount of the apples and onions on each sandwich. Close the sandwiches.  Brush olive oil on each side of the sandwich, grilling each side for 5-7 minutes until the bread is golden and the cheese is melted.


Cut the sandwiches in half for easier handling, and sink into these deliciously sweet and savory sandwiches.  You can never beat using real quality ingredients and these sandwiches are proof of that.  Wonderbread and Kraft singles just can't match up to the hearty whole wheat and real Wisconsin cheese. They are best when eaten immediately, but they can always be reheated in the oven to retain the crispness of the bread.

For the full recipe and nutrition facts click HERE.


Today's song is by Florence + The Machine :) It's called Shake It Out. She has such a unique sound and I love it.

Thanks for stopping by!

Wednesday, June 5, 2013

Spring Fresh Salads

Last week I went grocery shopping for the first time in quite a while, and went a little nuts in the produce aisle. I was so excited to see all those gorgeous fruits and vegetables that seem to disappear during the winter time here in the tundra! I guess I should clarify...I tend to shop at Aldi because they are so much cheaper than nearly every other grocery store, even dare I say, Walmart. Nevertheless, Aldi has a lot of good quality food.  You may not be able to find everything there (aka the out of season produce during the winter), however you can stock up on the basics and save a lot of money.  Now, back to what I was originally getting to...fruits and vegetables galore!   I ended up coming home with all sorts of goodies, and with some of it, I made two different salads that could be enjoyed during the spring and summer...Mango Chicken Pasta Salad and Zesty Rainbow Rice.  I wanted to test the recipes before I suggested using them for a cooking demo I will be doing in July with Anne, one of the RD's I'm working with this summer.  They were both delicious, but I ended up just picking one, as we will only have a short amount of time for the demo.

The Mango Chicken Pasta Salad is kind of a catch-all type of salad, and I ended up eating it for a few days in a row as a meal 1) because it made waaaaay more than I expected and 2) it was just so good!  It has something from every food group: whole grains (pasta), fruit (fresh mango!), vegetables (fresh spinach, carrots, red pepper, orange pepper, yellow pepper, tomato, red onion, cucumber, you name it!), lean meat (white meat chicken), nuts (almonds and sunflower seeds)....the only thing it is missing is dairy, but a little bit of feta or mozzarella could fix that!


Despite having a long list of ingredients, everything works so well together in this salad.  What brings it all together is the dressing!  I will admit, I used a store bought dressing, which are notoriously high in sodium content, however for the size of the salad compared to the amount of dressing you use, it turns out to be a surprisingly reasonable amount of sodium.  I used about 3/4 cup of Kraft's Zesty Lime Vinaigrette, and it was so tasty! I got to thinking that I should try to make up my own vinaigrette, just to see how easy it is....well let me tell you, I was wrong! Haha.  Don't get me wrong, there isn't much to making a vinaigrette, as long as you have the right recipe.   Trying to make one up from scratch when you have no experience in it at all?? Well, that's a different story.  After a few scratched batches, I finally came up with something I liked, and that was the Honey Lime Vinaigrette.  It's super simple and definitely a sweet and tangy dressing, so I thought it would work well with this salad.  In fact, both recipes today use FRESH lime juice! :) nom nom...there's just a soft spot in my heart for limes compared to lemons...but shh! don't tell the lemons I said so.

To get the recipe and nutrition facts for the Mango Chicken Pasta Salad and vinaigrette, click HERE.

The Zesty Rainbow Rice I made the following day, and this one has much more of a southwest flavor, rather than that of the sweeter flavor of the pasta salad.  It also has a lot of vegetables in it, with long grain brown rice providing a nice alternate grain, and a zesty lime and cumin dressing.


What I also loooove about this one is the freshly chopped cilantro and parsley!  They add so much more flavor than their dried counterparts.  For the full recipe and nutrition facts, click HERE.

The song I'm sharing today is also from a newer group that I have been obsessed with lately, Imagine Dragons (which I will be going to see at Summerfest in Milwaukee in the end of June with by boyfriend, Nick!!! Can you tell I'm excited?!!).  And because of recent events, I know exactly which song to pick. :)  Here is "On Top of the World" by Imagine Dragons.


Thanks for stopping by!

Tuesday, June 4, 2013

Well, Hello There! - Spring Rhubarb Oatmeal Breakfast Bake

I have been thinking for a while that I wanted to create a food blog, but always put it off as something I would do "in the future."  But here it is, my first entry. :) I am currently studying Dietetics at the University of Wisconsin-Stout, and have one more year left before graduation. Naturally, food is one of my passions!  I just love food...everything about it....growing it, preparing it, cooking it, looking at it, smelling it, eating it!  Haha.  Especially nutritious foods, because they play such a key role in the health of the body, and we all have to eat, right?!  I want this blog to be not just about the food, but about life as well, because that is what nutrition is, part of a healthy lifestyle!  Don't get me wrong, not everything you and I eat is going to be the most nutritious, but that is okay every once in a while.  I don't think anyone should have to deprive themselves of foods that they love. :)  Anything can fit into a healthy lifestyle as long as it is in moderation.

With that, I am just starting my summer "vacation" and am going to be writing about some of the things that I am doing throughout the summer! I say "vacation" because even though school is out for summer, I will still be busy with many other things.  Starting with six credits of summer class, one being Multicultural Foods and the other being Principles of Management.  I am also working part time for my track and field coach, finding high school athletes to recruit for the team, and will be doing dietetic field experience at a community hospital/clinic with two different Registered Dietitians.  Later in the summer I am going to be a camp counselor at Camp Vista with the Wisconsin Lions Youth Exchange, which is an amazing experience that I have had the privilege of being a part of for two summers in the past, and that I get to return to this July!  But more on those things later.


Since it is Spring and all, I want to start out with a rhubarb recipe I made on this gloomy Tuesday morning.  Anybody who has a rhubarb plant in their yard can relate to the fact that when it grows, it grows a lot!  And with such a bounty of rhubarb this time of year, I am always looking for new things to make with it!  I found this recipe from Gastronomical Sovereignty and thought it sounded delectable.  It was simple and easy to make, and even though it may be deemed a "breakfast" food, I think it could just as easily be enjoyed as a dessert or afternoon snack.


I started with 2 cups of diced rhubarb, and instead of the juice of an orange, I substituted a lemon, mixed together with 2 tbsp of sugar in a bowl.  I also used plain white sugar instead of natural cane sugar.


In a separate bowl, I combined the oats, walnuts (I used a whole cup instead of half a cup...Mmmm I love walnuts!), sugar, baking powder, salt, and cinnamon.


In another bowl, I combined the melted unsalted butter (emphasis on unsalted, because I used salted, and it turned out a little too salty for my taste, however the salt in the dry ingredient mixture could be omitted if salted butter is the only option), milk, beaten egg, and vanilla extract.  

I then started layering my baking dish, which I first sprayed with nonstick canola oil spray.  The first layer is the sugared rhubarb (excuse the blurry pictures - I took all the photos with my phone in low light!).  The second layer was the dry ingredient mixture, spread over the rhubarb evenly.  The final layer is made by drizzling the egg and milk mixture onto the oats, and tilting the pan to make sure it is distributed evenly.

The only thing left to do is bake it on the middle rack in the oven for 35-45 minutes at 375 degrees Fahrenheit until golden brown and the oatmeal has set.  Wah-lah...now you have a delicious snack with a good amount of fiber, vitamin C, and manganese. 


For the full recipe and nutrition information click HERE.

PS-Even though it has nothing to do with food, I thought I would share a song that I'm digging with each post.  Music always makes things better, and I always have to have something playing in the background, especially when I'm cooking!  I just discovered the British singer Olly Murs, so I'll share one of his songs today that I just can't get out of my head! :) "Dance With Me Tonight" by Olly Murs


Thanks for stopping by! :)